


October Caddis
Well, it’s been a long time since I posted any flies. Summer came and I admit I got busier and lazier at the same time. But now we are in to Fall, and I am stoked to get back to tying and posting some cool patterns. As summer wanes and the grasshoppers die off the bugs that are left hatching are mostly small to tiny mayflies. We get a smattering of Mahogany Duns, and later, a decent gray drake hatch, but mostly it’s tiny size 18-22 mayflies. Some are olives, but some are white bodies, some are smudgy gray. The fish will key in on the little guys during an active hatch, but you don’t really want to go searching for fish with flies that small. While October caddis are not prolific on the rivers I fish, it doesn’t take many for the fish to notice them and be willing to bite.
When I was developing this pattern I tried to focus on a couple different traits that I thought were important. First, I wanted a fly that would skate like a steelhead pattern. Second, I wanted it to float well enough to hold up an emerger and still skate. I pictured this as a pattern that you can cast quartering across and fish much like a wet fly or skating steelhead fly. To this end I tied it on a long shank hook to work as a keel to help the wake. I added foam over the body to float better. I gave it a bit more floatation with the poly underwing and then added the hackle that goes both around the shank and around the foam post. There may be some more minor tweaking, but I got the action I needed and the look I wanted.
The emerger is pretty straightforward. I really like La Fontaines caddis emergers and I wanted to simulate the air bubbles the naturals use to rise to the surface, so I added the packing foam over the top of the body. This foam is much less buoyant than normal foam, it’s readily available and looks great.
When you fish the two flies together, you get the attention-grabbing wake of the dry along with the subtly swimming lift of the emerger. It’s an explosive duo. Fish it on a dead drift and let the emerger sink down a bit then start waking the dry across the current and hold on!
October Caddis
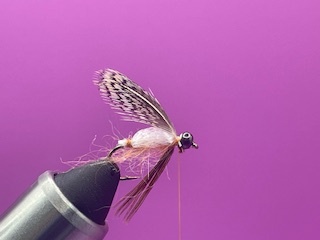
Hook: size 10 light wire 2X long
Thread: 3/0 Pale Orange
Body: Dusty Orange custom blend with orange foam over the top
Wing: 4-5 Orange Krystal Flash, Silver Widow’s Web, Orange Deer hair
Post: Orange foam from body
Hackle: Rusty Grizzly neck hackle
Let’s get started!
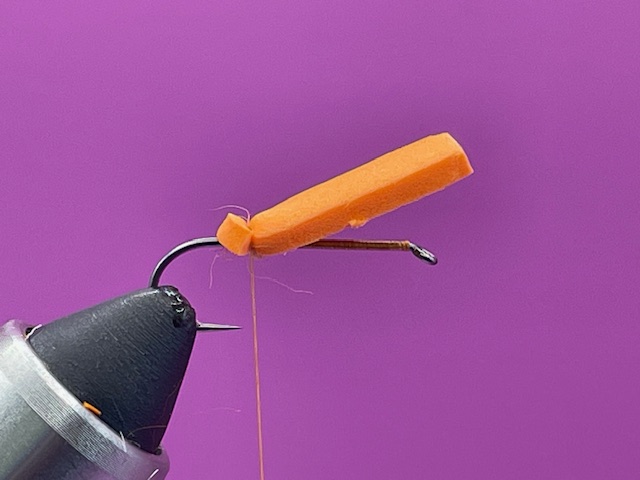
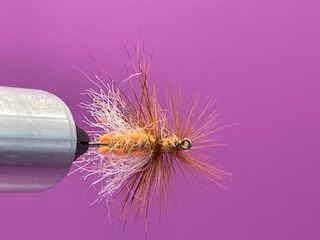
1. Tie in thread and wrap back to just in front of the point of the hook. Tie in the foam and start the dubbing. I use a dubbing loop, mostly for durability, but it’s not necessary.

2. Wrap the dubbing forward and make two segments in the foam. Don’t cut the tag end of foam. You will use it to make the hackle post. You want a shaggy/ buggy body. If you’re making your own dubbing blend use a mixture of natural and synthetic materials plus long and short fibers.
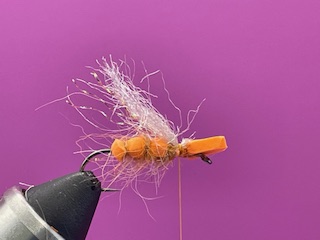
3. Tie in the Krystal Flash and a sparse bit of Widow’s Web or other poly wing material.
4. Tie in the deer hair and try to flair it as wide as you can. Next, twist the foam ninety degrees clockwise and wrap around and up the foam to make a secure post.
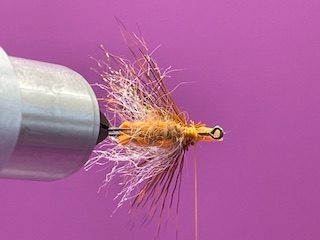
5. I add a drop of glue at this point. Tie in the hackle at the base of the wing. Make two wraps around the shank, but then turn the hackle and make three to five wraps around the foam post. Tie off hackle and whip finish. Perhaps add more glue if needed to hold the hackle and knot.
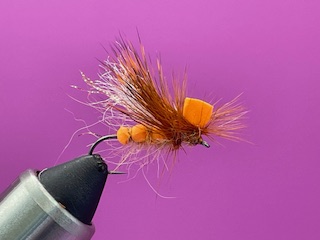
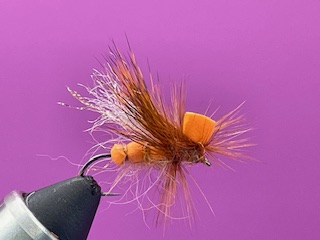
6. Here’s the finished fly. I clipped the hackle on the bottom of the fly for a lower and more stable float.
Now on to the second half of the duo.
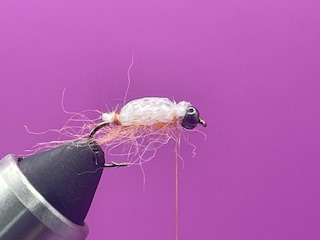
October Caddis Pupa
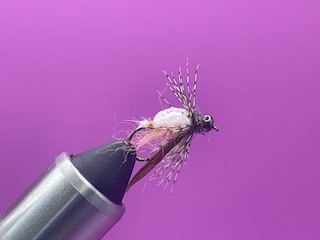
Hook: size 10 standard dry fly
Bead: 3mm black
Thread: 3/0 Pale Orange
Body: Dusty Orange custom blend with packing foam over body
Legs: Pheasant tail and grouse soft hackle
Collar: Peacock Ice Dub
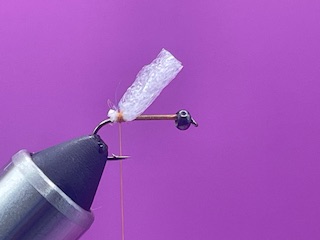
1. Put the bead on. Tie in thread and wrap back to where the thread hangs right at the base of the barb. Wrap a tiny amount of dubbing and tie in the foam on top of it. The dubbing will keep the foam from spinning.
2. Dub a very sparse shaggy/buggy body. Fold the foam over the body and tie it down.
3. Tie in a clump of pheasant tail, (I counted seven in this clump), to the bottom of the shank. The legs should extend a bit past the bend of the hook. Tie in the grouse feather.
4. Wrap the grouse one or two times and tie off. Dub a small collar with the Ice Dub and whip finish. I add a drop of glue on top.
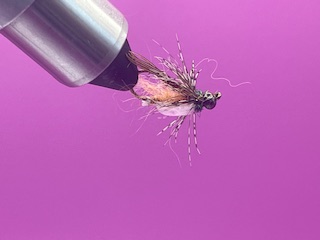
Here’s another look at the finished fly.
Have fun!!!